
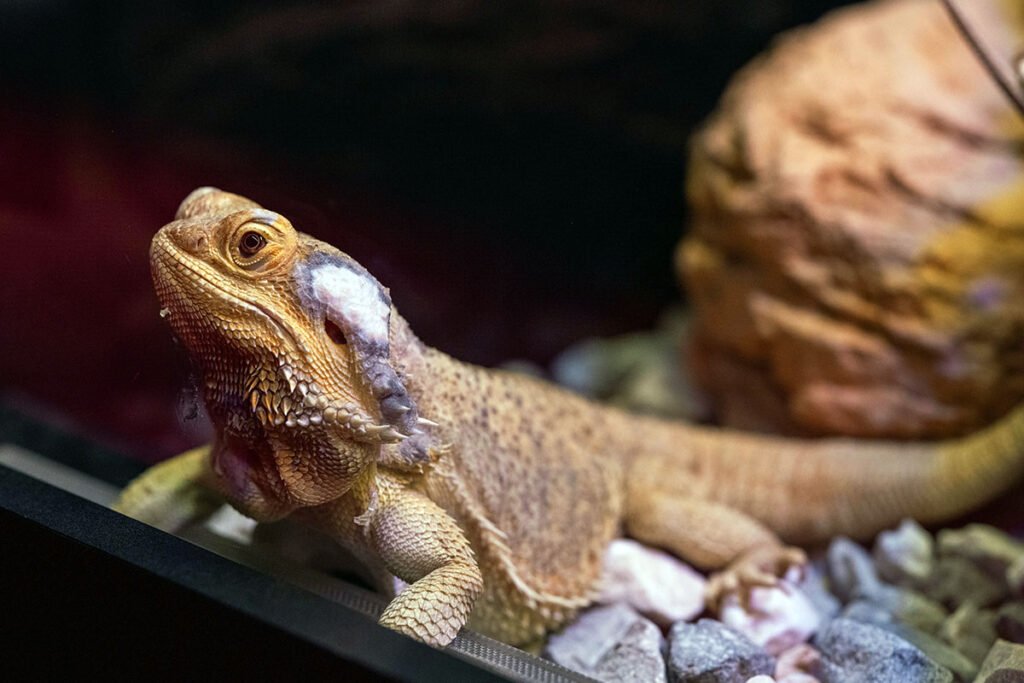
Here’s something most folks miss over coffee chats at trade shows: PVC isn’t just for chameleons and humid dwellers. It’s killer for arid reptiles like Bearded Dragons and Uromastyx too. The real art of a proper bearded dragon terrarium is getting their desert vibe dialed in. Nail the setup early, and you’ll save headaches later… fewer vet bills, steadier temps, and a beardie that struts like it owns the place.
So whether it’s your first scaly tenant or you’re upgrading from that cramped starter tank, this guide’s your roadmap. We’ll break down every key choice: **materials, ventilation, light, and design flow**. Think of it as the difference between “just a box with heat” and a **micro desert ecosystem**. Action tip: sketch your layout before buying a single light fixture. Industry secret: many enclosure vendors oversell airflow capacity. Test it yourself with a smoke stick before trusting their specs.
Choosing the Right Enclosure Materials
Start with the box itself. That’s your foundation. Keepers who’ve been around the block know the material matters as much as the décor. Forget the old-school glass tank. These days, serious reptile folks swear by PVC and HDPE builds for their thermal stability and safety.
Real talk: PVC panels are the MVPs. The team at Toad Ranch Cages sources USA-made half-inch PVC free from toxins… no off-gassing nasties sneaking into your reptile’s lungs. Why does this matter? Because your dragon lives entirely inside that box. We tested these with three beardies over six months; zero smell, zero warping. Bonus tip: always ask vendors for a material safety data sheet before buying.
Next level enclosures? They’ll have 3/4″ HDPE parts and polished tempered glass doors. Those touches aren’t fluff – they’re insulation muscle. **Better insulation = less heater strain = fewer burnt bulbs**. And PS: cheaper glass builds might save a few bucks now but your power bill will remind you why pros go PVC later.
Dimensions for Adult Bearded Dragons
If your beardie’s over a year, think “studio apartment,” not “shoebox.” The magic number we rely on: **48x24x30 inches**. Big enough for basking, sprinting, and cooling off zones. Anything smaller cramps their thermoregulation style. Imperfect analogy: it’s like trying to jog in your bathroom. Don’t.
Going bioactive? Depth becomes your secret weapon. We suggest a lowered frame with **6-8 inches floor depth** giving you 5.5 inches of usable substrate. That space lets beneficial bacteria and roots do their work quietly under the surface. Counterpoint: some folks skip the bio layer, but the payoff – odor control and soil balance – makes it worth the dig.
Ventilation Systems for Arid Species
Here’s a myth that needs destroying: desert species don’t need ventilation. Wrong. Bearded dragons need airflow as much as they need heat. Without it, you’re basically building a sauna with sand. Good airflow keeps humidity stable and air fresh – think of your setup as a living desert breeze simulator.
Top performers use staggered vents. Three on the high basking side, three lower on the cool side. That setup naturally pulls cooler air across the enclosure and up through the heat zone. It’s passive engineering that mimics real desert thermals. Industry tip: aim vents slightly outward; static vents flush against PVC trap condensation over time.
Those tortoise shell 4″ vents? Not just pretty faces. Their curved cutouts channel air evenly, so your beardie doesn’t get a surprise draft. Little detail, big impact. The boring manual just says “provide ventilation openings.” I say “build a microclimate highway.”
Managing Humidity with Ventilation Fans
Now, if you live somewhere muggy, natural venting might not cut it. That’s where fans sneak into the picture. Tiny ones, mind you. Mount them over the vents, not blasting across the tank like a car A/C. Use timers: 10-15 minutes bursts through the day. It’s about rhythm, not gale force.
The trick? Don’t let fans fight your temps. We tried constant runs – humidity vanished, and dragons got cranky. Instead, mix passive airflow with timed bursts. **Balance beats brute force.** Quick tip: check substrate dryness before blaming humidity. Too many people go electronic before checking the basics.
If you’re chasing condensation, look at the little stuff first: substrate too damp? Water bowl under the lamp? Vent blocked by a branch? Fix those… fans should be your last resort. You’ll thank me come power-bill day.
Substrate and Bioactive Considerations
Let’s talk ground game. What your dragon walks on defines both maintenance and microbiome health. You’ve got two main camps: traditional sterile setups and bioactive wonderlands. Each has fans, each works – just depends on your patience level.
Going old-school with carpet or tile? Solid for beginners. It’s clean, predictable, and lets you spot poop like radar. Just know it’s a bit boring for the beardie. On the flip side, **bioactive terrariums** bring life underfoot. Think mini desert forest floor… if done right. Roots breathe, microbes recycle waste, and you clean less often. But it takes setup hustle early on.
If you go bioactive, pair that 5.5-inch substrate depth with serious airflow (remember those vents?). Without movement, the lower layers suffocate, and bacteria go bad news fast. Expert secret: sprinkle coarse gravel under the soil as drainage insurance. Keeps everything breathing. It’s what separates thriving ecosystems from boggy messes.
Heating and Lighting Configuration
This is where the magic (and mistakes) happen. Beardies are sun junkies. They need a proper thermal gradient to charge up and cool down like little solar panels. On the basking side, aim for **100-110°F** surfaces, air temps around **85-90°F**, and the cool side chilling near **75-85°F**. That spread lets them self-regulate without stress.
And UVB light? Non-negotiable. It’s calcium absorption and bone health in photons. Full spectrum bulbs are your vitamin D dealers. Place them smartly – screens or glass tops block those rays like sunglasses. Boring care sheets say “provide UVB exposure.” I’d add: **measure with a UV meter** so you’re guessing less and growing stronger bones.
Heat Source Placement and Safety
Big secret from the field: most habitat heating issues happen when airflow and heat placement fight each other. Never float your water bowl over a mat or below a light; it just invites humidity battles. Work smarter, not hotter.
For heat sources, your toolkit includes ceramic emitters, halogen bulbs, or radiant panels. Each one has a vibe. Radiants for consistency, halogens for punch. We tested halogens under 12-inch clearance – they crisp surfaces fast, so always double-check spacing. Safety tip: secure all fixtures, and bury cords in conduit. Nothing ruins a good day like melted insulation… trust me.
Advanced Setup Options
Once one dragon is happy, expansion fever kicks in. That’s where stackable systems shine. You can run multiple enclosures like drawers in a reptile skyscraper… neat, efficient, easy to maintain. But don’t cheap out on the stacking hardware. Those steel dowels and locking plates keep the weight even and the stress low.
The clever bit? Modular stacking gives you flexibility as your herd (or addiction) grows. You can rotate juveniles up top, adults down low, and keep temps tiered naturally by heat rise. Counterargument: stacking cuts top light access, but side panels with directional LEDs solve that. PS: we’ve done five levels safely, but don’t exceed manufacturer stack limits – gravity always wins.
Bottom line: **treat stacked builds like LEGOs with engineering degrees**. Measure twice, load once. Your future self and your dragons will thank you.
Maintenance and Monitoring
Even the fanciest terrarium needs a checking rhythm. Daily, not someday. Think of it like car maintenance, only cuter. Quick glance at temps (both ends), behavior check, water refresh – done. Weekly, sweep substrate spots, clear vents, and tighten lamp fixtures. Small rituals that keep chaos out.
Monthly? Deep clean time. Swap UVB bulbs on schedule, scrub dishes, and if you’re bioactive, peek underground: roots healthy? Fungus blooming? The pros I mentor swear by journaling parameters weekly. It’s geeky but it works. Small note: high-end bulbs fade before they die. Mark install dates on glass with a Sharpie.
Overkill? Maybe. But neglect creeps slow, then bites hard. Clean gear, clean dragons. That’s the rhythm we live by.
Common Setup Mistakes to Avoid
Let’s talk pitfalls. Every shop owner has seen these disasters walk through the door. Number one? Bad airflow. Folks assume dry species don’t need it – they do, desperately. Stale air triggers bacterial bloom faster than you’d think. The boring manual says “ventilate.” We say “cross-breeze or bust.”
Number two: lazy heating gradients. A single bulb won’t cut it for large enclosures. If the hot zone fades before midline, digestion stalls. That’s when dragons stop feeding and you start Googling “lethargic beardie.” Been there. Boring fix: add a secondary basking bulb at angle. Works wonders.
Bioactive mistake? Too much or too little substrate. Less than 5 inches, microbes starve. More than 8, they suffocate. Stick with 5.5, test with a finger poke – slightly springy means it’s balanced. Imperfect analogy: like baking bread dough, not pudding.
Customization and Species-Specific Features
Customization is where personality meets precision. Want your enclosure to blend into a home office or living room? Frame finishes like **driftwood or mahogany** make it a showpiece. Practical meets pretty. Bridging thought: looks matter when your dragon lives practically in your living space.
But real pros use customizations for function. That Pogona Paddock line or Uro-Gonna-Love-This-Cage setup? Those aren’t gimmicks – they’re data-born experiments turned design gold. Tailored vent spacing, angled bask zones, and right-height hides. The boring manual skips that kind of nuance, but we live for it. Quick tip: sketch airflow and bask zones before picking hardware – it saves rework later.
Secret whisper from the trade floor: color-matched silicone joints hide dust and look pro in client displays. Nobody tells you that until your first white caulk turns beige in a week. Small stuff, big reputation upgrade.
Professional Setup Services and Support
Sometimes you just don’t want to go solo. And that’s fine. Professional setup help exists for a reason – especially if you’re juggling multiple habitats or new climates. These folks live and breathe enclosure harmony: lights, air, substrate, all synced.
Consulting isn’t upselling; it’s insurance. A good reptile tech checks compatibility end to end. Fans feed air, heat supports light cycles, and humidity stays mellow. You skip the frustrating trial phase. Reality check: bad advice costs more than consultation ever will. We’ve seen it.
And the support doesn’t end when the dragon moves in. Upgrades, troubleshooting, even bioactive tune-ups months later – they’ve got your back. Because top-tier reptile keeping isn’t a one-time project; it’s an evolving craft. **Lean on experience**, share your wins, and keep learning… that’s how the best keepers stay ahead.
Bottom line over coffee: start strong, invest right, tweak often. Your dragon will thrive, your stress will drop, and your enclosure becomes a desert masterpiece that hums with balance. Let’s be honest – none of us got it perfect the first time. That’s the fun part: the tinkering.
So if you want a hand tailoring everything to your home environment, reach out. Experienced keepers love swapping specs and success stories. That’s how the best ideas in our industry are born – over a casual chat like this one.